Advertisement
7 Moves To Help Stretch & Strengthen The Psoas + Why It Matters

As a certified Pilates instructor, the No. 1 complaint I hear from my clients these days is that their hips are killing them from all the sitting and screen time they've been doing. You yourself might be thinking, "I stretch my hips all the time and they're STILL tight!" The instinct to stretch when you're experiencing symptoms of achiness and pain is a good one—but it only works temporarily. Now, let me introduce you to an important part of your hips that could probably use some attention: the psoas.
What is the psoas?
The psoas is your primary hip flexor, connecting your lumbar vertebrae to your femur, or thigh bone. It begins at the bottom of your mid-back (the T12 vertebra, to be exact), wraps around your pelvis over the hip points, and connects to the inner thighs. In addition to flexing the hip, or drawing the leg and torso closer together, it also functions as one of your deepest core muscles.
You're probably most used to noticing the psoas after sitting for an extended period of time (when it tightens up), or doing ab work on your back that involves a lot of leg movement (when it fires up).
Why it's important to work the psoas.
Many of us don't actually have tight hips but rather hips that just feel tight due to weakness. (Say what?!) Simply stretching a muscle that doesn't really need stretching—but instead, strengthening—can cause postural and pain problems.
Psoas weakness and tightness often also manifest in unexpected places, like chronic low-back pain, poor posture, leg-length discrepancy, limited internal/external rotation, sciatica, pelvic floor dysfunction, and even painful sex.
How to distinguish hip tightness from weakness.
To test if you actually have tight hip flexors, lie down with your hips hanging off the edge of a bed and hug one knee into your chest. If you're able to draw the top knee into your chest while the bottom leg remains flat to the bed, it's not hip tightness that is causing tension and pain but weakness.
Knowing what's going on in your own body is not only empowering but allows you to focus on what is actually going to make a difference in how you feel long term. Giving your psoas what it needs can not only help improve the efficacy of your fitness routine but also improve your overall quality of life.
Below, I've compiled some of my favorite moves to both stretch and strengthen that psoas, for some much-needed hip relief.
7 ways to stretch and strengthen the psoas:
Diaphragmatic breathing
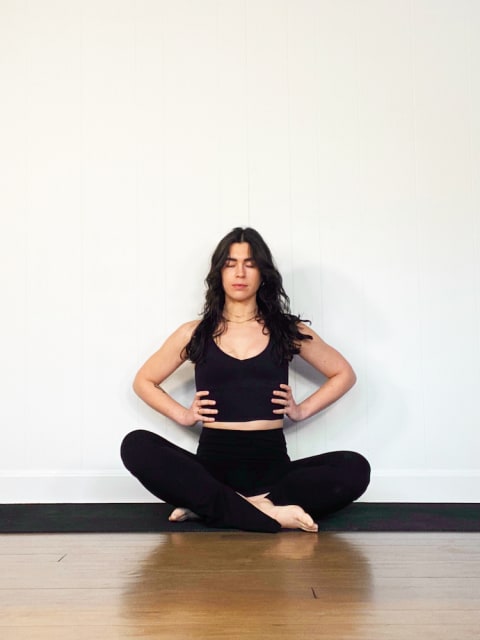
I always start with breath because drawing awareness to a three-dimensional diaphragmatic expansion not only accesses your core more intensely but sets you up to integrate this throughout your entire practice:
- To practice a proper 3D breath, inhale in through your nose, filling up the low belly, sides of the ribs, and backs of the ribs equally.
- It's crucial to get back-body expansion, as this is where we tend to hold the most tension, causing compensation in the psoas.
- Aim for 5 to 10 deep breaths to get started.
Knee to chest press
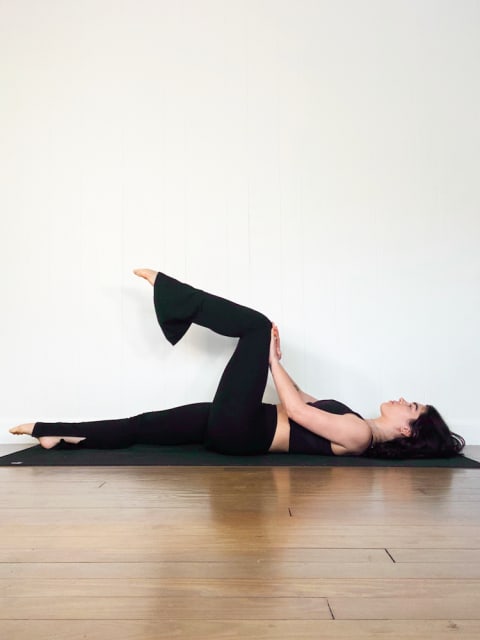
Engaging a muscle before focusing on releasing it can encourage a deeper release, so aim to warm the body first before diving straight into stretching:
- Lie flat on your back with your legs extended straight in front of you, and bring the right leg up to a tabletop, or flexed position, deliberately engaging the hip flexors.
- Take your hands to the top of your thigh as if you were putting them on your lap. As you exhale, press equally from hands into thigh and thigh into hands to fire up not just the psoas but the core as well. You want the engagement to be equal in both directions so your leg isn't actually being pushed but finding stability.
- The longer you hold this, the more intense it will feel, but aim for 3 to 5 deep breaths to start, and repeat on the second side, paying attention to any differences from one side to the next.
Double knee to chest press
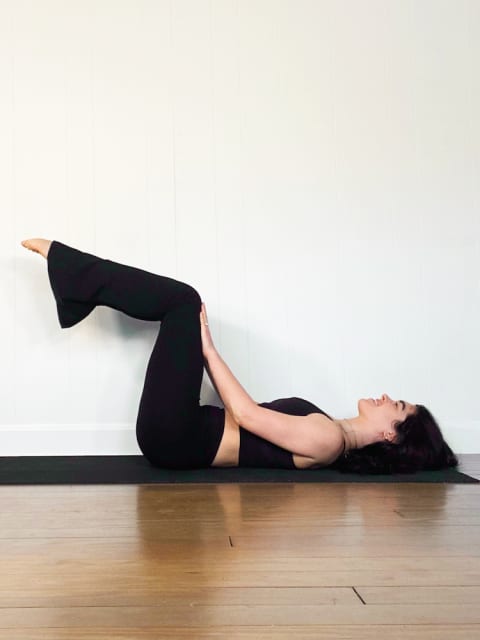
Kick your knee-chest press exercise up a notch by including both legs at once:
- Bring both legs up to tabletop, and press one hand to each thigh.
- Without shrugging the shoulders or tensing the neck, press the hands and thighs into one another, deeper on each exhale.
- Aim for 3 to 5 breaths to start, then release the legs back to the floor and see if you feel any difference.
Hip extension over with external rotation
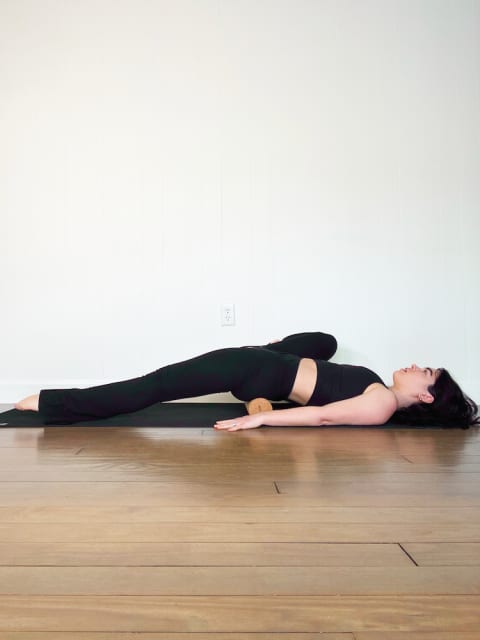
Modifying the strength variations in a more supported way can make it become an active stretch:
- Place a foam roller (or yoga block or throw pillow) underneath the sacrum/tailbone area (be sure it's not too high), and extend both legs straight in front of you.
- Once again, bring one leg up to tabletop, but this time, hug it into your chest.
- Energize the bottom leg by straightening it as much as possible while trying to press the heel through the floor, which will activate the back of the leg and glutes. Squeeze your glutes to intensify.
- Without shifting your pelvis, slowly draw the top knee into your armpit to feel even more release.
Side-lying psoas stretch
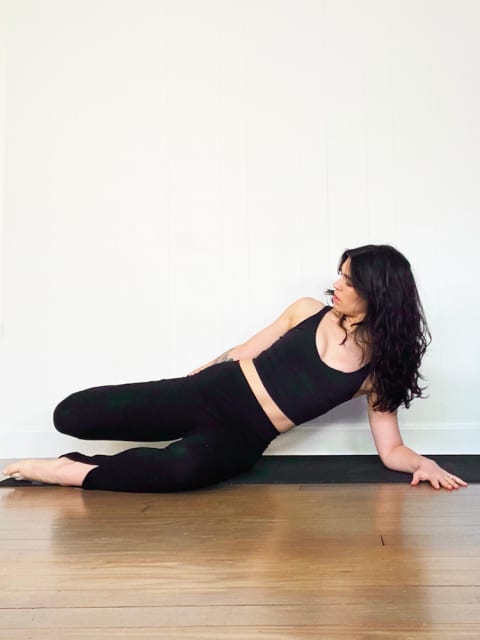
You've probably done this stretch in a standing position. Taking it to the floor gives us more support, which can allow you to release not just the quads but the hip flexors as well.
- Lie on your side, with the bottom leg bent. Extend your bottom arm as a pillow, or prop yourself up on your forearm, as you would in a side plank.
- Bend the top leg and reach for your top foot with your top arm. Draw the heel in toward your glutes, slighting tucking the pelvis to prevent hyperextension of the spine and keeping the knees close together.
- Flex the foot to intensify. Hold for 5 to 10 deep breaths, and repeat on the second leg, again, checking in with any differences from side to side.
Standing knee drive to deadlift
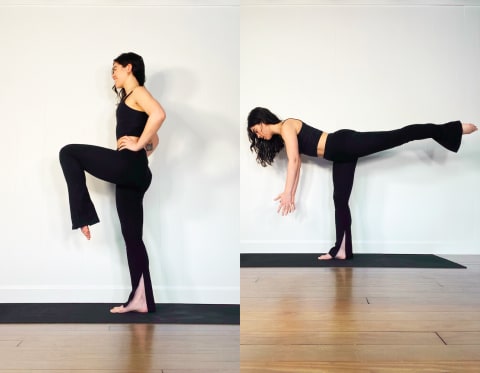
This one is great not just for strengthening the hip flexors but the entire core will work to help you find your balance. In this move, you access both hip flexion (strength) and extensions (stretch) in one compound movement:
- Standing tall with your feet hip-width apart, use your core and your hip flexors to bring one knee up to the marching band position.
- Take your time to find your balance, and hinge forward at the hip while reaching the lifted leg straight behind you.
- Keep the standing leg relatively straight (but not locked), and be sure the movement is starting from the hip, not the knee.
- If balance is an issue for you, stand close to a wall or a chair for extra support.
- Repeat 5 to 10 times and again on the second side.
Kneeling lunge stretch (or Eve's lunge)
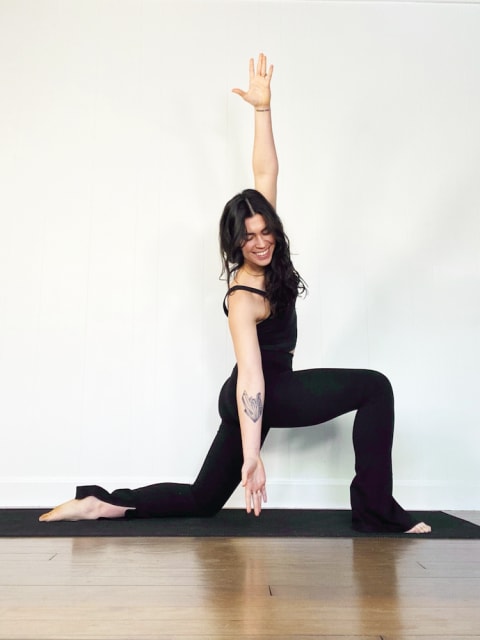
You may already know this one, but you might be doing it incorrectly and missing out on its full potential:
- Starting on all fours, step one foot through your hands so that the ankle is stacked under the knee, and the sole of the foot is flat on the floor.
- Using your core, bring your torso up to vertical. Instead of sinking into your low back, lift the ribs away from the pelvis to grow taller, and slightly tuck the tail under.
- Engage the glutes and gently press the pelvis forward, only as far as you can without compressing the low back.
- To intensify this stretch, reach one arm up and side bend (to the direction of the front leg).
Whether your hips truly are tight or they just feel that way, strength and stability work is your best friend. Think of your stability exercises as the glue that holds our stretches together: Building strength will allow the relief from stretching to actually last. That way, you don't get stuck in a repetitive scenario, having to stretch your hip flexors over and over. Instead, you'll get to enjoy mobile, pain-free hips!
