Advertisement
How To Use A Diffuser: From Short Hair To Long Curls + The 4 Best

I remember the first time I saw a hair diffuser. I spent hours watching who knows how many YouTube videos in hopes of perfecting my naturally curly hair routine. Time after time, I saw women using this funky-looking attachment, known as a diffuser, on their blow dryer, and the end result was, well, flawless. Every curl was bouncy, perfectly placed, and really defined. So, I decided to pick one up for myself, and I've never looked back.
Diffusers are one of those hair tools that you either know and love or you're totally clueless about what it is or how to use it. Let's put an end to the guessing game and answer the question at hand: How do you use a diffuser? With the help of two celebrity hairstylists, we're answering all your diffuser questions once and for all.
What is a diffuser?
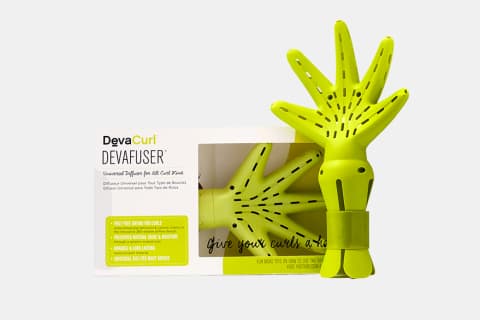
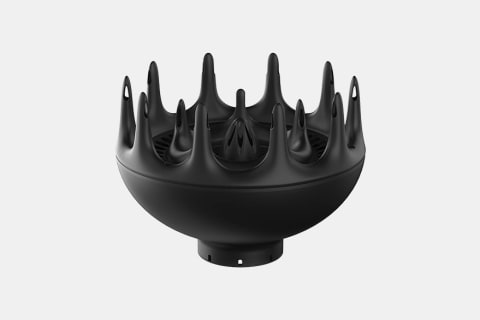
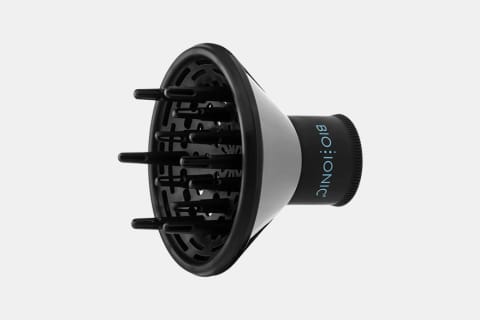
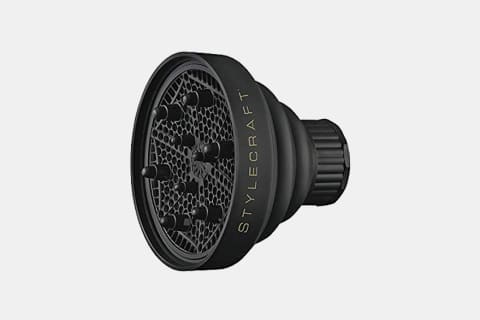
A diffuser is a blow dryer attachment with a large round base and large rounded spikes or prongs. Some bases are flat, and some are cone-shaped, but no matter the shape, the point of the attachment is to efficiently dry textured hair without causing frizz. According to celebrity hairstylist Nate Rosenkranz, a diffuser is all about the airflow. "A diffuser slows and distributes the airflow coming from within the dryer," he says. "It works to gently dry the hair without disrupting the curl pattern, which is typically highly susceptible to frizz." If you have wavy or curly strands, you know the struggle.
How does a diffuser work?
Now that we know why the diffuser is a go-to for textured hair, you're probably wondering if it's really necessary in the styling process. In short, the answer is yes. You see, those large spikes in the attachment change the airflow from the blow dryer from being direct and aggressive when using a traditional nozzle to being slow and steady. And that's the golden ticket to blow-dried curls without frizz and flyaways. "The attachment has dozens of tiny holes for the air to escape, so it's not as direct, like that of a nozzle," says brand celebrity hairstylist Marcus Francis, brand ambassador for BetterNatured. "The restricted hair from the dryer allows it to focus more on letting the heat come out." It's basically a sped-up version of air-drying with a few added perks like super-defined and soft ringlets in a quarter of the time. Diffusing the hair doesn't interfere with the curl pattern or shape but simply allows the slow and steady airflow to dry the hair evenly. Not to mention, it gives the hair gorgeous volume...more on that later.
Who is it best for?
The quick answer to this question is anyone with textured hair. It doesn't matter if your strands are short or long. If you have any sort of wave, curl, or coil to your hair, the diffuser was made with you in mind. While it's probably not worth the investment if you have pin-straight locks, there is one reason straight-haired gals may want to give diffusing a try. Francis suggests using a diffuser on straight hair to add natural movement or texture to the hair. Perhaps if paired with the right product cocktail and a whole lot of scrunching, you may be able to accomplish a slightly beachy-wave look. I totally commend experimenting in the name of beauty. But the bottom line is this tool was made for textured hair.
How to use it.
If you are like me and watched a dozen YouTube videos in hopes of learning how to diffuse, I can guarantee you've seen a dozen different ways to use the diffuser. And truly, there's nothing wrong with finding your own way to use the tool, but for those of us who appreciate step-by-step guidance, below I'll explain how the pros suggest using it.
But before we dive into the step-by-step, here are a few important notes. You want to use the diffuser on wet hair post-shower, and the way you use the diffuser will vary on your hair length. Before you diffuse, apply all of your styling products (heat protectant is highly suggested) directly after you shower or wash your hair.
Francis suggests cranking up the heat and turning down the airspeed. Allow the heat to dry the hair instead of a higher airflow. Also, remember, once you start diffusing your hair, avoid touching your hair with your fingers. Trust me, it makes a huge difference in the smoothness of the curl.
- If you have pixie-cut length, you'll want to hover the diffuser over your hair but not press against it. "The spokes will help air go into the hair and get the air even throughout," says Francis. "This will help the hair to have a bit of volume and not be flat."
- For bob-length strands, Francis recommends focusing the diffuser at the top of the head and then the ends. "Don't be afraid to take the diffuser close to the head and go into the hair so the hair is dried evenly," he suggests.
- For long hair, the process is pretty much the same, but you'll want to add focus on the ends.
And no matter the hair length, you'll want to continue diffusing until the hair is about 80% dry. Then, let the rest of your hair air-dry for best results.
It's also important to know your desired end result. If you want your curls to look uniform and more on the tame side, you'll want to use less motion when drying with the diffuser. If you want va-va-volume, try flipping your head upside down and moving the diffuser up and down in a scrunching motion. This will give you more volume at the roots of the hair. But be warned, the more you flip and scrunch, the larger your hair will be.
The best diffusers
We rounded up our favorite hair diffusers here, but for your shopping ease we've included some in this story as well. Shop below.
The takeaway
If you've got textured hair, a diffuser is worth a try. It's a speedy way to dry curls without adding frizz. It's also a great tool for adding volume and lift. There really are no hard-and-fast rules when it comes to diffusing. Use the pro tips as a guideline, and do whatever works best for you. Want to amp up your curly hair routine? Check out mbg's guide to caring for curly hair.
