Advertisement
How To Make The Perfect Candle At Home: Materials, Method & Master Tips


Candles are one of those small indulgences that can brighten a day. They're a work-from-home staple and the perfect accompaniment for a relaxing evening. But sometimes, there's an emphasis on the indulgence part—it's not unusual for a luxury candle to carry a luxury price tag of $60 or more these days. Which has many candle connoisseurs wondering, "Can I make this myself?"
The answer is, of course, yes! Making your own candles at home is not only economical but fun. It's one of those gratifying projects that gets you back to basics and connects you with past generations of people who've made things with their own two hands.
Plus, it allows you to control exactly what ingredients go into your clean-burning candle.
Ready to make your home a little brighter? Here's everything you need to know about making DIY candles.
What to know before starting
The idea of a craft that involves heat can be a little intimidating, but candlemaking can be as simple or as adventurous as you want it to be. You can follow the straightforward process, which takes only three steps, or add your own flourish with scent, layering, multiple wicks, and more.
The following method is an easy-to-follow process that even beginning DIYers can tackle. It's something you could even accomplish with older children and supervision. Don't overthink it or try to perfect it the first time—that's what practice is for.
What you'll need to make candles at home
Only a few supplies are needed to make DIY candles at home, and while they may not be regular household items, they're easy enough to find and source online.
- Heat-proof container (feel free to upcycle an old mug or jar)
- Wax pellets
- Wicks
- Essential oil (optional, for fragrance)
- Popsicle sticks and masking tape (optional)
How to make DIY candles
Choose your heat-proof container and determine how much wax you will need.
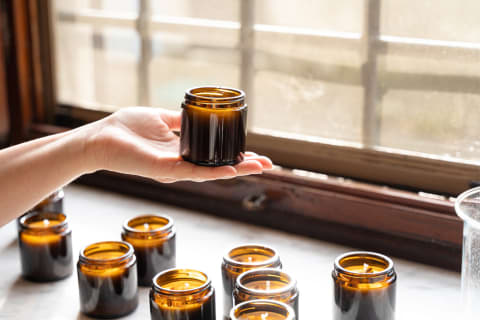
Use a measuring cup of water to accurately measure by filling the vessel with water and then pouring it into the measuring cup. This is how much melted wax you'll need. Another method of measuring is to fill the container with the dry wax flakes and multiply by two.
Place and attach your wick.
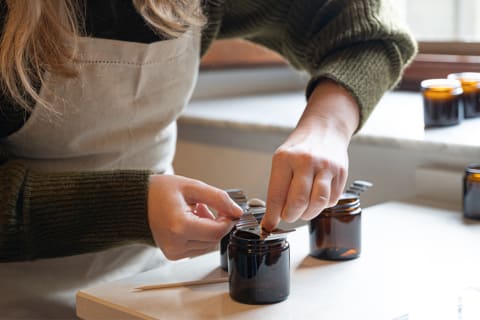
If you're using just one wick, place it in the middle of the bottom of your vessel. If you're using multiple, place them evenly throughout. At this point, you'll want to attach your wick so that it remains straight. An easy option is to use masking tape and popsicle sticks to form a brace at the top of your vessel to hold the wick in place.
Heat the wax.
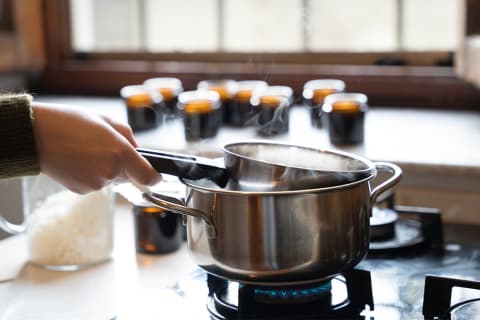
Heat the wax in a saucepan on the stove until it is the consistency of a liquid oil. You can clean the saucepan and use it for food again afterward, but if you're concerned about the mess, you can also use a double boiler for this step. Fill your pan with water and place a heat-proof container with your wax in or on the water bath. Bring the water to a boil and stir until your wax has melted. Carefully remove your wax from heat.
Add your scent.
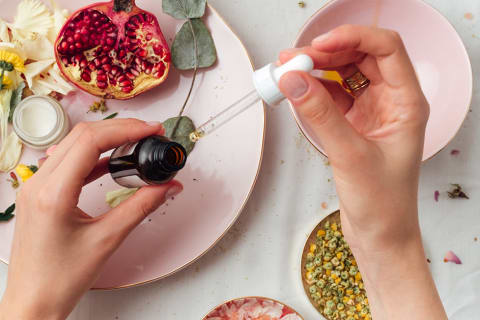
If you're using any essential oils to scent your candle, now is the time to add those. Make sure your wax has cooled down to below 140 degrees Fahrenheit or the essential oil could be damaged. Add up to 20 drops for a 16-ounce candle. You'll often need more scent than you anticipate.
Transfer the melted wax and fragrance to your container and let cool.
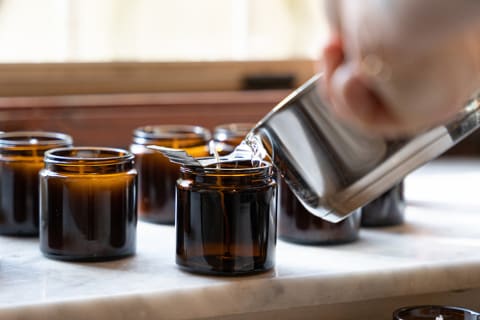
Once it has cooled completely, trim the wick down to about one-quarter inch, light, and enjoy your deliciously scented and economical candle!
Top tips from candle masters
When you're eager to dive in and learn the ropes of candlemaking, the best place to go is the experts. Keeping candlemaking simple and fun is important, recommends Roxanne Kwiecinski of The Honeycomb Home, but to make things more interesting, she says, "I experiment with different molds and other accessories!"
For those who have advanced past their first few pours, it may be time to start focusing on the details, including smoothing out the cracks and craters that can form once a candle is set.
Brittni Mehlhoff of Paper & Stitch advises, "To get a perfectly smooth candle, use a small heat gun, like an embossing heat gun, and re-melt the surface while moving the heat gun around in a circular motion. Once it sets again, the candle will be nice and smooth on top."
Combining scents is also part of the fun of making candles, and it's something that Anna Sproul-Latimer has become passionate about in pursuing her candlemaking hobby. However, scents aren't always what they seem. She says, "Scent test every combination of fragrance oils or essential oils before making a candle. They never combine the way you think they will."
And, don't get discouraged if a scented candle appears to be a fail. Sproul-Latimer says, "Be patient. Wait a week, at least for the scent to fully cure. Then, burn test the candle to see exactly what you've made."
Candlemaking FAQs
Where should I buy supplies? Is there an easy way to get the right items?
You can usually find your supplies at a craft store, big-box store, or online shop. The supplies needed are straightforward, but you can make it even easier by purchasing a DIY candlemaking kit. As you begin to figure out what works best for you, then you can branch out and try other items.
Is there a particular type of wax that is best?
Beeswax candles are slow-burning and a much cleaner option than petroleum-derived paraffin wax candles, but they do have a subtle fragrance, even without scent. Soy wax also burns cleaner than paraffin and holds its scent, but it is often blended with other oils, so you have to do your homework before you buy.
What types of containers are best?
Any heat-proof container is fair game. You can use glass jars, travel tins, or ceramic options. (If you do use glass, just make sure it is thick enough to stand up to the heat.) You can even reuse your old store-bought candle containers!
How do you choose a scent? Is there an art to combining scents?
When selecting a scent for your candle, you'll want to choose essential oils that have a stronger, longer-lasting fragrance, including eucalyptus, cinnamon, orange, or pine. Try combining your main scent with a less dominating fragrance to achieve the perfect balance. Check out this blending guide for some more inspiration.
Then, you can test scent combinations by placing your blend on a cotton ball and taking a whiff. Adjust the ratios as needed before you choose to add the oil to your wax.
Are there any recommendations to reduce the mess of candlemaking?
Yes! Putting a layer of aluminum foil on your counter before you get started will make for easy cleanup. Be sure to clean any oil that does make it onto your home's surfaces quickly: As long as the oil is still liquid, it will be easy to wipe up. Once it solidifies, that's when things get dicey. At that point, you'll want to scrape the wax off or try to freeze it with an ice cube, at which point it should shatter.
Is there a way to properly burn a candle?
How many times have you burned a beautiful new candle only to find that the wax has tunneled in the middle once it dries? This is easy to avoid, as long as you make sure to burn the candle until it evenly pools across the entire surface the first time you burn it.
Make sure to avoid short burns in the future too; aim to leave your candles going for at least an hour at a time but no longer than four hours as they'll lose their scent after that.
The takeaway
Making your own candles ensures that you'll always have one on hand to burn or gift to friends and family.
Candlemaking is also a fun hobby that is easy to level up: Try out new scent combinations and vessels to find a signature candle that will give you the warm fuzzies every time you light it.

