Advertisement
The Geometry Of Great Eyebrows — A Makeup Artist Explains

Here at mbg, we believe that beauty is uniquely yours. In our video series Bare Your Beauty, we break down various techniques, rituals, and how-to’s designed to help you feel good in your own skin, whether your goal is to de-stress, update your skin care regimen, or try a new look.
If the eyes are the window to the soul, then the eyebrows are the window frame to the face. Having a strong brow makes you feel put-together whether you're wearing a full face or no other makeup at all. Here, makeup artist Jessa Blades shares her hard-earned makeup artist secrets on brows, especially ones that look au naturel.
1. Measure where the brows should start.
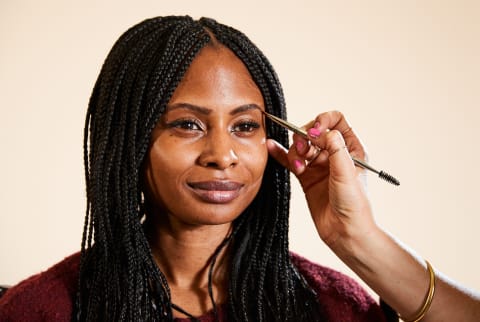
Use a makeup brush as a straight edge to help guide the brow's natural starting point. Holding it against the outside of the nose, align the brush with the inner corner of the eye. The brush should extend past the brow—the point it hits along is where the brow should start. Mark it with a pencil or trace it with your mind's eye. Jessa likes Antonym's brow pencils and used dark brown in the video.
2. Measure where the brows naturally should end.
Take your brush and, holding it against the outside of the nose, align the brush with the outer corner of the eye. Where the end of the brush falls on the eyebrow line is where the brow should end. You can mark this with a brow pencil if you're using one.
3. Align the tip of your arch with your pupil.
It shouldn't be too close to the inner brow—in fact, if anything, it should be slightly closer to the outer side of the brow.
4. Choose a neutral color.
Many brow products pull "warm," but most people need a neutral tone. Look for something that looks like it's more on the grayscale rather than a warm brown. Using a color that's a little lighter than the actual color of the brow is a good trick to ensure the makeup maintains a natural look.
5. If you use a pencil, make sure it's properly sharpened.
If the pencil is dull, you are more likely to use too much product. Instead of filling it in like you would a shape on a paper, draw little strokes that mimic eyebrow hairs.
6. If you prefer a powder, use the correct brush.
A small, angled brush will pick up and deposit just enough powder while allowing you to draw in the brow with precision. After adding color to your brows, check your work according to Jessa's tips in the video. She likes using Jane Iredale's eyeshadow as a brow powder and worked with the deep matte brown shade.
7. Seal the deal.
If you don't have brow gel, you can use lip balm! This will help keep the color and brow hairs in place as you go about your day.
8. Make it pop.
If desired, add highlighter to the inner corners of the eyes and under the brow bone to add more dimension to the look. Jessa likes the RMS luminizer quad.
If you're feeling inspired to do more eye makeup, check out how to make your eyes look brighter in three simple steps.

